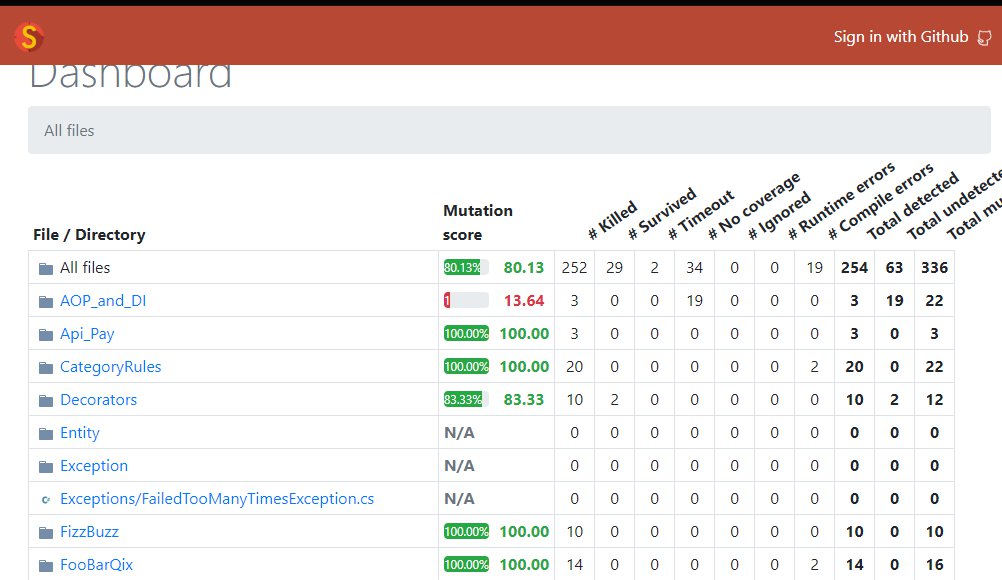
Azure DevOps 的 BackLogs 放著許多 Feature , 依據不同的功能,再將每個 Sprint 的 User Story 放進去 這些 Feature 永遠不會被作完,隨著時間過去, 儘管完成了許多 User Story ,但是也會有新的 User Story 被加進去。 而作為文件,他的巢狀結構又不足以面對複雜的需求內容, 分散式存儲對於維護與修改上也是相同不便。
<!-- rules to map from logger name to target --> <rules> <!--All logs, including from Microsoft--> <loggername="*"minlevel="Trace"writeTo="allfile" /> <loggername="*"minlevel="Trace"writeTo="ElasticSearch" /> </rules> </nlog>
我的 Logger 代碼可能會類似這樣: 我想調整 Logger 代碼,不要與商務邏輯混在一起。
一般的 Logger 我會用 AOP 的方式作成 Audit Log 記錄
catch Exception 的 Logger 我會統一處理
1 2 3 4 5 6 7 8 9 10 11 12 13
privatereadonly ILogger logger;
public Result MyMethod(Context ctx) { this.logger.LogInformation("Hello Marsen"); try{ //// do some thing } catch { this.logger.LogError("What's a Wonderful World"); } }
[ServiceFilter(typeof(AuditLogAttribute))] public Result MyMethod(Context ctx) { try{ //// do some thing } catch { this.logger.LogError("What's a Wonderful World"); } }
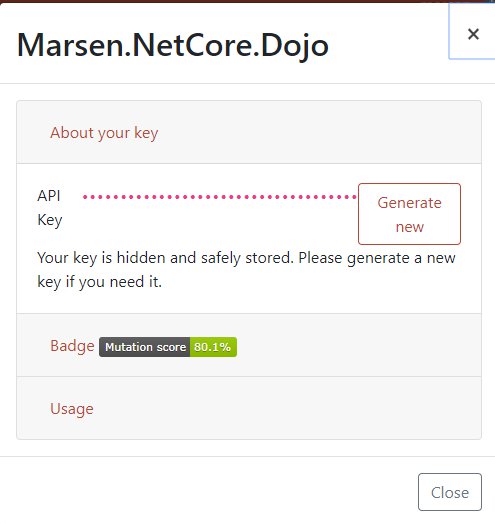
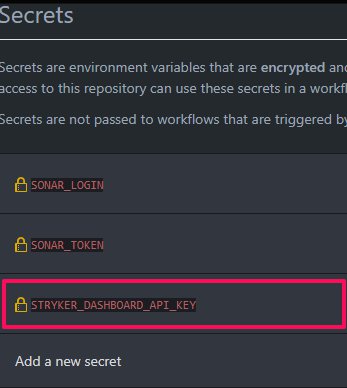
-tp|--test-projects Specify what test projects should run on the project under test. -p|--project-file <projectFileName> Used for matching the project references when finding the project to mutate. Example: "ExampleProject.csproj" -dk|--dashboard-api-key <api-key> Api key for dashboard reporter. You can get your key here: https://dashboard.stryker-mutator.io
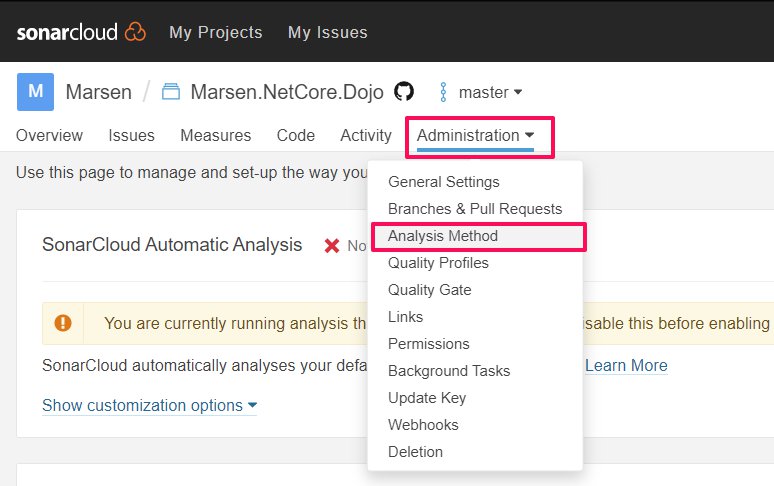
You are running CI analysis while Automatic Analysis is enabled. Please consider disabling one or the other.
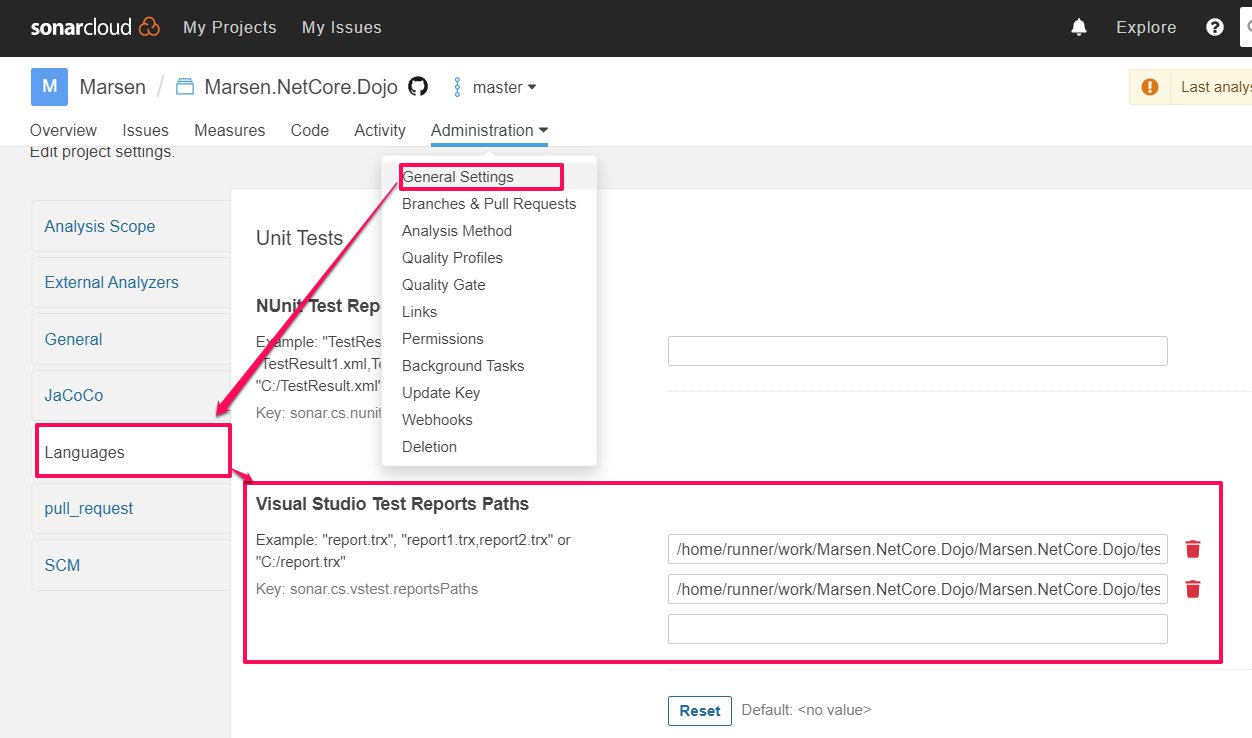
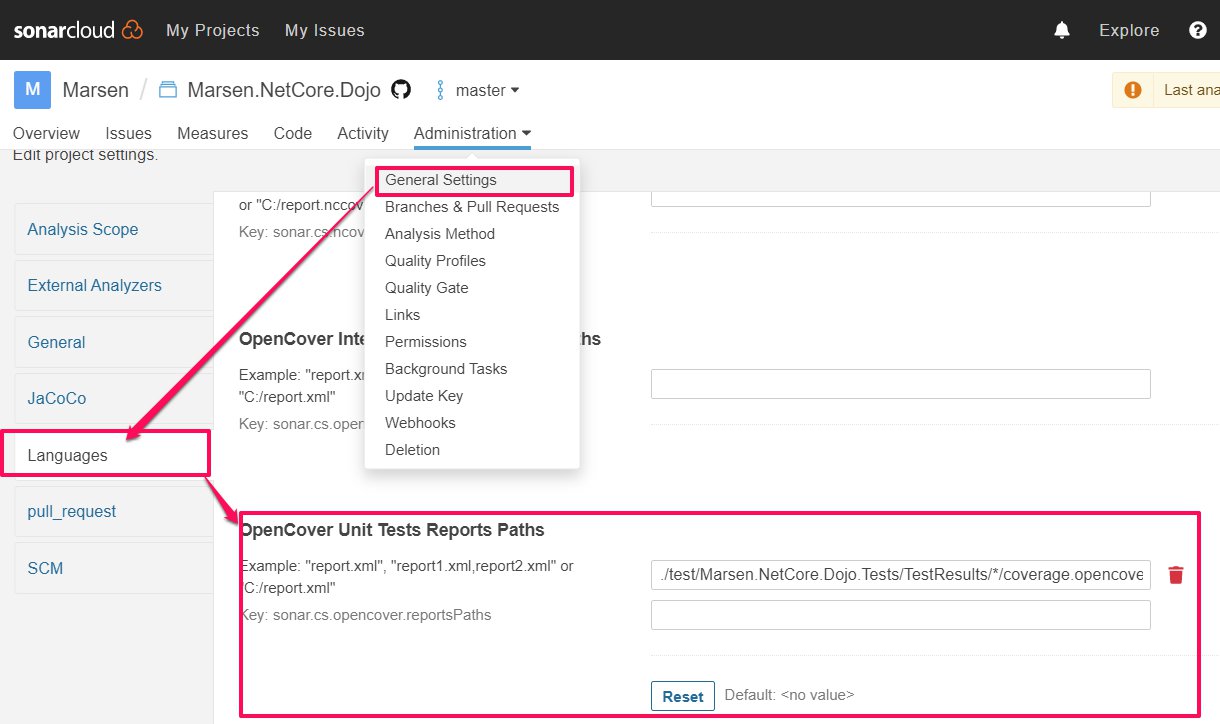
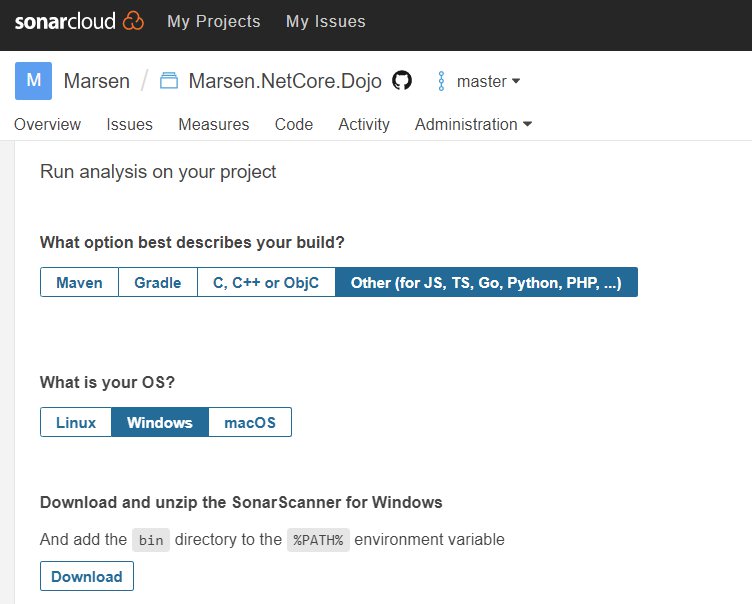
另外目前支援的 CI 服務有 Circle CI 與 Travis CI , 一樣殘念的是沒有支援 Github Action 。 另外兩個選項目是 Other CI 與 Manually (手動) 。 我的前一篇文章就是使用手動的方式把檢查報告打到 SonarCloud。 雖然只隔一年,但 UI 介面上已經有些差距,我還是再作一次介紹。
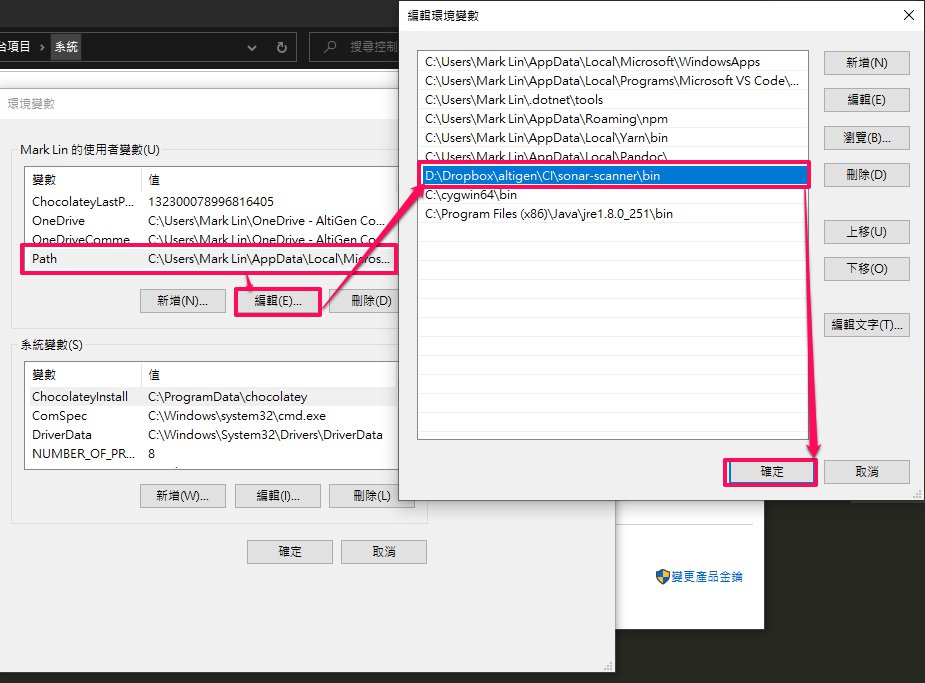
這裡要注意的是, 首先每次你都需要安裝 Dotnet Sonarscanner , 其實我不清楚 Github Action 背後的機制,但是我猜測應該是用到容器化的技術, 每次 CI 執行時都會起一個實體(這個可設定,但是 Linux Like 的 OS 又快又便宜,就別考慮 Windows 了吧請參考) 所以每次都要重頭安裝相關的軟體,比如 : Dotnet Sonarscanner 。
var target = new PickupService(configService, storeSettingService, logger);
var actual = target.GetUpdateStatus(2, new List<string> {"TestWayBillNo"}); actual.Should().BeEquivalentTo(new List<ShippingOrderUpdateEntity> { new ShippingOrderUpdateEntity { AcceptTime = new DateTime(2020, 03, 03, 17, 51, 20), OuterCode = "TestWayBillNo", Status = StatusEnum.Finish } });
Legacy Code 相依 HttpClient
大部份的功能我都可以透過 DI 的手段隔離, 但是之前的 Test Driven Develop 的方法並沒有將 HttpClient 轉換成可以隔離的物件。 另外一部份代碼是透過 Copy Paste 手法產生的代碼,所以也有可能會有 Legacy Code。 這裡我優先處理 HttpClient 。
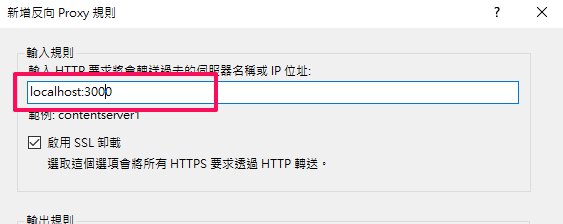
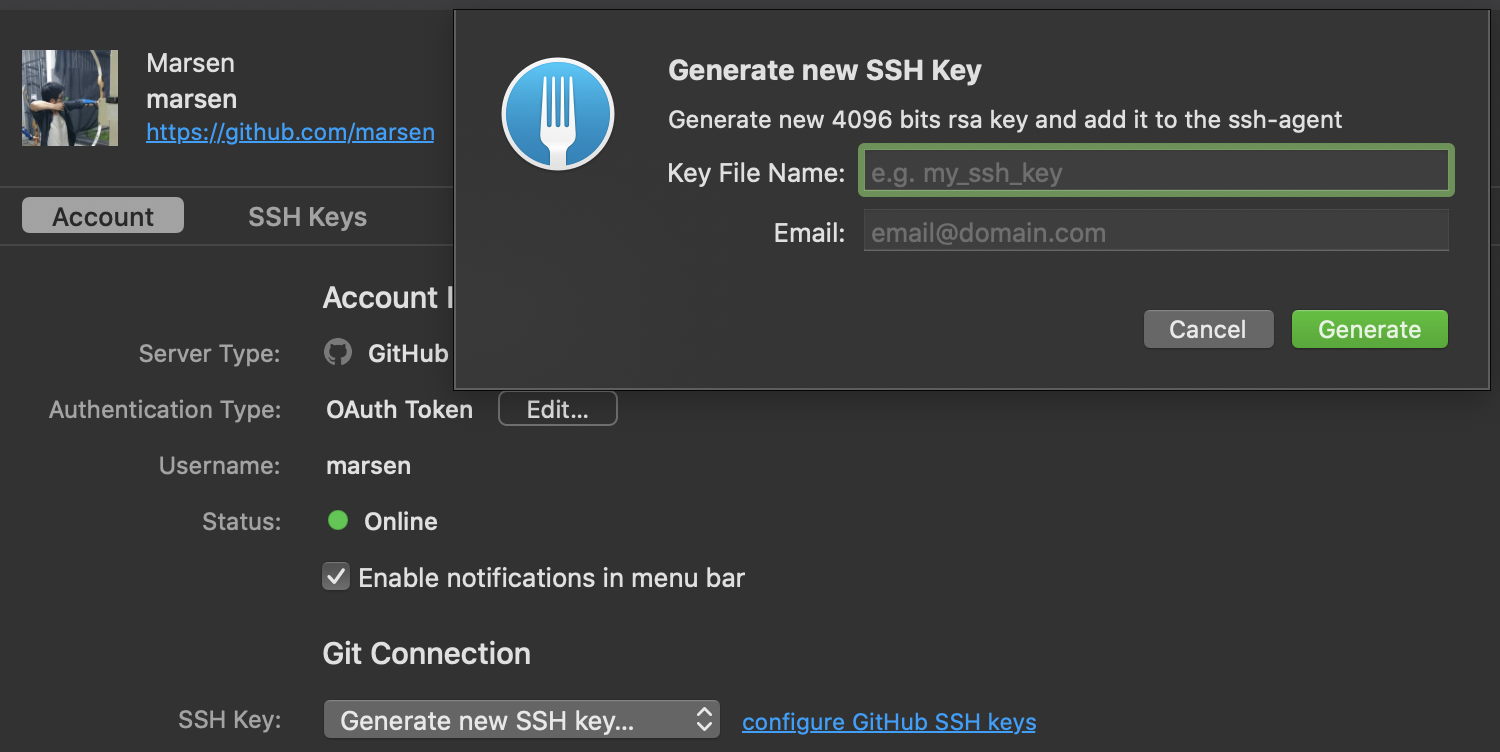
[email protected]: Permission denied (publickey). fatal: Could not read from remote repository. Please make sure you have the correct access rights and the repository exists.
debug1: Will attempt key: /Users/marsen/.ssh/id_rsa debug1: Will attempt key: /Users/marsen/.ssh/id_dsa debug1: Will attempt key: /Users/marsen/.ssh/id_ecdsa debug1: Will attempt key: /Users/marsen/.ssh/id_ed25519 debug1: Will attempt key: /Users/marsen/.ssh/id_xmss
[Fact] publicvoidCase1_Just_Run() { var target = new PickupService(); long storeId = 0; List<string> waybillNo = new List<string>(); target.GetUpdateStatus(storeId, waybillNo); }
因為沒有想法,所以沒有 Assert 這不算是測試,頂多是一個小工具可以隨時呼叫我的 Production Code 而已
+ var requestContent = JsonSerializer.Serialize(new { Type = "DeliveryOrder", waybillNo }); + var httpContent = new StringContent(requestContent, Encoding.UTF8, "application/json");
前面產生的 TODO 項目並不是「最」重要的, 我應該先處理回傳的資料,讓整件事情串通。 開立 TODO 如下
1 2 3
+ //// TODO Parse Response Entity + //// TODO Switch Status + //// TODO Return ShippingOrderUpdateEntity List
可以得知,我最終會回傳一包 List, 這個時候我可以 Assert 了
修改第一個測試案例
這個階段我開始撥雲見日,我要很明確的寫下第一個測試案例, 第一個案例我會直接作 Happy Case , 也就是目前的呼叫的 API 只打一筆,回傳 Done 的資料。
這裡進一步作需求分析, 呼叫完 API 我會收到一大包 JSON 資料, 需要轉成我可以處理的物件, 其中最重要的欄位 lastStatusId 會回傳各種狀態,
DONE
FAIL
Arrived
Shipping
SMS
Expiry
我只處理
已取貨(DONE) 系統狀態為 Finish
失敗(FAIL、Expiry) 系統狀態為 Abnormal
貨到待取(Arrived) 系統狀態為 Arrived
出貨中(Shipping) 系統狀態為 Processing
分析後,我的測項將會是向 API 循問一筆資料 且回傳一筆為 Done 的 ShippingOrderUpdateEntity 給我。
1 2 3 4 5 6 7 8 9
[Fact] publicvoidCase1_Query_Done_waybillNo() { var target = new PickupService(); long storeId = 1; List<string> waybillNo = new List<string> {"TEST2002181800010"}; var actual = target.GetUpdateStatus(storeId, waybillNo).FirstOrDefault().Status; actual.Should().Be(StatusEnum.Finish); }
var configService = Substitute.For<IConfigService>();
configService.GetAppSetting("pickup.service.url")
        .Returns("http://www.mocky.io/v2/********");
var target = new PickupService(configService);